CUCM is a software-based call-processing component which serves as the main engine for Cisco VOIP infrastructure. This article can be used as a reference for your CUCM installation, This article can be used for any version of CUCM like 8.0, 8.6, 9.1 or 10.5. Let's jump to the installation directly.
Make sure you have..
Before we begin, I want to make sure that you have the below softwares installed in your machine.Vmware Workstation
Bootable Cisco Unified Call Manager ISO File
GNS3 (Optional) - To Configure NTP Server
A minimum of 2GB RAM and 80 GB HDD for Virtual Machine
At this stage I assume that you have both Vmware Workstation and GNS3 installed. During installation you will be prompted to enter NTP server details. Follow the below steps to make a router to act as a NTP server in GNS3.
Open ncpa.cpl from Run window. Find a Vmware network adapter. Double click the adapter and configure a private range IP, for example 120.0.0.1.
Next open GNS3, Put a router and take console. Paste the below configurations,
Router#configure terminal

Enter configuration commands, one per line.  End with CNTL/Z.

Router(config)#interface fastethernet 0/0

Router(config-if)#ip add 120.0.0.2 255.255.255.0

Router(config-if)#no shut

Router(config-if)#exit

Router(config)#clock timezone EST –5

Router(config)#clock summer-time EDT recurring

Router(config)#clock calendar-valid

Router(config)#ntp master 8

Router(config)#end

Router#
Now place a cloud in GNS3 topology window and add your Vmware network adapter (The one we configured above) as Cloud interface.
If you don't want to do configure a dedicated NTP server, You can always use public NTP like 1.gr.pool.ntp.org
If you have a reachable NTP server ready, We are good to start the CUCM installation.
Configuring Virtual Machine in Vmware for CUCM Installation
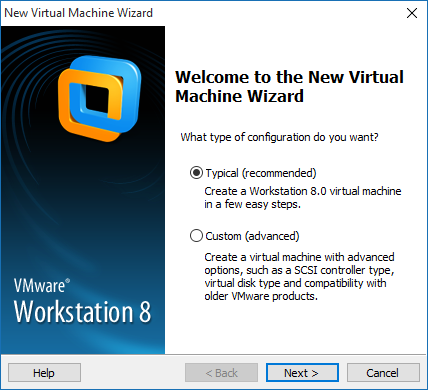
I have taken the below screenshots while I was creating the VM, this will give you an idea to create your own VM. Click Create new Virtual Machine from the Home of Vmware Workstation,
Select Typical and Click Next,
UCSInstall_UCOS_10.5.1.10000-7.sgn.iso
UCSInstall_UCOS_8.6.2.24901-1.sgn.iso
Bootable_UCSInstall_UCOS_7.0.1.11000-2.sgn.iso
UCSInstall_UCOS_7.0.4.10000-18 sgn iso
Bootable_UCSInstall_UCOS_9.1.2.11900-12.sgn


Give some username and password, You don't have to remember this username and password since you are not going to use it anywhere.

Once you have created the VM, Change the RAM and Network Adapter settings. Below snapshots will give you an idea,

Any of the Network Adapter options can be used, Bridged means your VM is bridged with your physical hardware. NAT uses your base machine's IP details in order to access Internet. I recommend you to use your custom VM Adapter, This will make your job easier during NTP test.

Click OK, Your VM is ready now. Power on the VM to proceed with the CUCM Installation.
Step by Step CUCM Installation
Once you start your VM, your VM will go under a hardware test. And you will see aa message like 'VMware: passed detection validation' if everything goes well.If you want to perform a media check before we continue with the installation, You can click 'Yes'. I just skipped this check by saying No.

Depending upon the hardware you select, the below window changes. For example, If you have allocated 8 GB RAM and 160 GB Hard disk for your VM, you will be able to install CUC and CUCM Business edition also. Since I have allocated only 2GB RAM, I can only install CUCM here.

Next window shows your CUCM version. I have used 8.0.2 for this article, Hence it's showing the same. Just click Yes.

Ofcourse we want to proceed with the installation, Click Proceed.

This option allows you to upgrade the software version that is contained on the installation disc with a later release.If you want to upgrade your VM from 8.6 to 9.1 or from 9.1 to 10.5, you will have to click Yes. In our case, we are not doing any upgradation and Hence we will go with No.

Click Continue.

Next few Windows allows you to setup your CUCM. These are basic configurations like, Timezone, MTU, DHP, DNS, etc.,


It is recommended to configure static IP for CUCM, You don't want to mess with this option as all the IP phones and Voice Gateways are going to use this IP only. If you are forced to use DHCP, at least make sure that you have Reservation enabled for this particular IP.


In this window, you have enter your OS username and password. This is used to configure the CUCM through CLI.


Since this is our First node in our cluster, This will be installed as Publisher. In case if we have another Pub already, we may configure it as a Subscriber if we want to do so.

In our preparation stage, we have configured a GNS3 router as a NTP server right ? Here you have to enter that IP address, Or if your VM has internet access you can use any public IP. If you use a name for NTP server, You should also have DNS configured.

This security password will be used to during Disaster Recovery scenarios. Make sure that you don't forget this password.

I don't have a need to configure SMTP client in CUCM, Just clicked, No.

This is the username and password that we are going to use all day. It's used to login into CUCM Web GUI.


Yes! Configurations over. Now all you have to do is WAIT. It' will take 7 hours for a 2 GB VM and 2 hours for a 4 GB VM to complete the installation.

If the installation is successful, you will see this login screen. Use the credentials that you have entered during the setup to login.

Also I want to show you how to access The Cisco Unified Communications Manager Administration page which is used to configure system parameters, route plans, devices, and much more.
Enter your CUCM's IP in the address bar of a browser. And click on CUCM Web page link. You will see below login screen. If you don't see a web page, Check this page to troubleshoot.

That's all folks, Have FUN with CUCM! If you face any issue during the installation do let me know.
Great Post!!
ReplyDeleteAny idea where can I get the CUCM ISO ? I would like to mount a lab and start testing and practicing for the CCNA Cert.
Thanks.!!
Very nice blog...
ReplyDeleteGreat information provided. We also provide VMware Training in Noida I appreciate your work.
Great Post. Thank you very much..!
ReplyDeleteHi I cant find a download for the CUCM iso please assist
ReplyDeletenice post!
ReplyDeleteSEO Company in Austin
ReplyDeleteSEO Company in Atlanta
SEO Company in Ohio
SEO Company in Boston
SEO Company in Birmingham
SEO Company in london
SEO Company in leeds
SEO Company in glasgow
SEO company in new york
ReplyDeleteSEO Companyin Texas
SEO Company in losangeles
SEO Company in califonia
SEO Company in Florida
Best Oracle dba training institute in noida
ReplyDeletebest linux training intitute in noida
Your Blog is very interesting & informative to read!
ReplyDeleteThanks for sharing the amazing process through pictures:)
Good Information...CUCM is a software-based call-processing component which serves as the main engine for Cisco VOIP infrastructure.
ReplyDeleteThank you for sharing wonderful information with us to get some idea about that content. check it once through
ReplyDeleteMachine Learning With TensorFlow Training and Course in Tel Aviv
| CPHQ Online Training in Beirut. Get Certified Online
Its a wonderful post and very helpful, thanks for all this information.
ReplyDeleteVmware Training in Noida
Vmware Course in Noida
Vmware Training institute in Noida
Thanks for sharing such a great blog Keep posting..
ReplyDeleteVMware Training in Delhi
useful information..nice..
ReplyDeletedevops-engineer-resume-samples
digital-marketing-resume-samples
digital-marketing-resume-samples
electronics-engineer-resume-sample
engineering-lab-technician-resume-samples
english-teacher-cv-sample
english-teacher-resume-example
english-teacher-resume-sample
excel-expert-resume-sample
executive-secretary-resume-samples
ReplyDeleteIt was great experience after reading this. thanks for sharing such good stuff with us.
VMware Course in Delhi
Thanks for sharing such Great stuff with us....Looking towards more, Advance wishes for upcoming Posts
ReplyDeleteJava training in chennai | Java training in annanagar | Java training in omr | Java training in porur | Java training in tambaram | Java training in velachery
Excellent information with unique content and it is very useful to know about the information based on blogs.. Thanks for sharing your blog is awesome.I gathered lots of information from this blog.
ReplyDeleteSalesforce Training in Chennai
Salesforce Online Training in Chennai
Salesforce Training in Bangalore
Salesforce Training in Hyderabad
Salesforce training in ameerpet
Salesforce Training in Pune
Salesforce Online Training
Salesforce Training
Very interesting blog. Many blogs I see these days do not really provide anything that attracts others, but believe me the way you interact is literally awesome.
ReplyDeleteSaleforce Training in Gurgaon
Saleforce Developer Training in Gurgaon
Salesforce lightning training in Gurgaon
Salesforce Einstein training in Gurgaon
Are you looking for AWS Training in Delhi? AP2V Academy is the best option for you! We are one of the best AWS Training provider Academy in Delhi, India. We Also conduct DevOps Training, Python Training, GCP Course, Linux Courses training, etc. Online live interactive classrooms with lifetime recording videos & 24*7 support.
ReplyDeleteFirst class site, where did u come happening pondering the notification coarsely this posting?i've obsession in a portion of the articles essentially about the solicitation for your site now, and I in fact in pantomime of your style. thankful a million and connect with progress forward on the functioning delivery faithfulness.. NTFS For Mac Crack
ReplyDeleteCharming test for a weblog. i've been examining the net for amusement and arrived re your web page. shocking understandable. much gratitude to you a ton for sharing your knowledge! it is invigorating to look that specific people anyway supplement an undertaking into adjusting to their destinations. i'll be veritable to check affirm inside the works indeed unambiguous quickly.. Avast Premier Latest Version Crack
ReplyDeleteFunny Cousin Quotes · Your cousin is the brother God knew your mother could not handle. · The craziness of your family is best understood by your cousins.. Frequently, Cousins Day 2022
ReplyDelete
ReplyDeleteI always felt uplifted after reading this blog's posts.
Soul House Vocals VST